Setup User Authentication in Flask
Intro
In the previous tutorial, I showed how to create the simplest possible Flask application - hello world. Unfortunately, the example application was too simple to show the full potential of the application structure, something I want to show in this post.
In this tutorial I will continue from the same code and develop a simple user authentication system. Users are the core to every modern-day application, and creating a user system is certainly the first step every develop takes on his or her journey to make the next world-changing application. You can start here.
To get a complete sense of the code base from before, please see the source code on Github.
Source code
You can download the source code on gibhub.
So what do I get in the end?
Good question. I will show how to create models with Flask-SQLAlchemy, do form validations using Flask-WTF, handling login sessions with Flask-Login and I would also show example usage of Flask-Script. There will also be code for the UI, but it will be quite minimal since this tutorial is mainly concerned with developing Flask. In the end, you'll be able to signup for a new user, login the user, refresh the page and you'll still be logged in, and then finally when you may logout, which will clear the user session from the server.
To be more specific, the following will happen during this tutorial:
- create a
usertable in the database (sqlite in this case). The table contains fields like first name, last name, email address, and user name and password. The password will be hashed for security reasons. - create 2 WTForms, one for user logins and one for signup. They will be used for validating post data from logins and signup.
- create 4 authentication endpoints:
/api/auth/verify_auth,/api/auth/login,/api/auth/logout, and/api/auth/signup. - create a light UI in
jqueryto demonstrate the aforementioned authentication APIs.
Alright, that's too much talking and not enough coding. Lets get right to it.
Step 1. Install dependencies
Flask is a very flexible framework and offers plenty of different extensions for things like logging, form validation and database abstraction (ORM). In this tutorial, I'm going to show the use of 4 commonly-used Flask extensions:
- Flask-WTF : integration with WTForm, which offers useful features like form validation and CSRF handling to prevent XSS attacks.
- Flask-SQALAlchemy : Integration to SQLAlchemy, a very simple and powerful library for database abstraction.
- Flask-Script : Useful extension for creating external scripts in Flask.
- Flask-Login: provides user session management for Flask.
$ pip install Flask-Script
$ pip install Flask-SQLAlchemy
$ pip install Flask-WTF
$ pip install Flask-Login
$ pip freeze > requirements.txt
Step 2: Create the files
To create a user authentication system, we would create a a frontend module for serving the html pages and a user module (folder) for handling user validation and database access. Then we would add a another API auth.py for authentication endpoints like logging in and signing out. To make everything work together, we'll create a few helper functions along the way.
$ cd DoubleDibz
$ touch manage.py
$ mkdir app/users
$ mkdir app/static
$ mkdir app/frontend
$ touch app/frontend/__init__.py
$ touch app/frontend/controller.py
$ touch app/models.py
$ touch app/common/helpers.py
$ touch app/common/response.py
$ touch app/users/UserModels.py
$ touch app/users/UserConstants.py
$ touch app/users/UserForms.py
$ touch app/users/__init__.py
$ touch app/api/auth.py
Our current structure:
DoubleDibz
├── app
│   ├── __init__.py
│   ├── api
│   │   ├── __init__.py
│   │   ├── auth.py
│   │   └── helloworld.py
│   ├── app.py
│   ├── common
│   │   ├── __init__.py
│   │   ├── constants.py
│   │   ├── helpers.py
│   │   └── response.py
│   ├── config.py
│   ├── extensions.py
│   ├── frontend
│   │   ├── __init__.py
│   │   └── controller.py
│   ├── models.py
│   ├── static
│   ├── templates
│   └── users
│       ├── UserConstants.py
│       ├── UserForms.py
│       ├── UserModels.py
│       └── __init__.py
├── manage.py
├── requirements.txt
└── run.py
I won't talk about every single line of code added or modified, such as app/common/helpers.py and app/common/response.py, but they are all crucial in the making of the system. So to get a sense of the bigger picture, take a look at the final code.
Step 3: Edit extensions.py and app.py
Initialize Flask-SQLAlchemy, Flask-WTF and Flask-Login extensions.
$ vim app/extensions.py
Place the following
# Flask-SQLAlchemy extension instance
from flask.ext.sqlalchemy import SQLAlchemy
db = SQLAlchemy()

# Flask-Login
from flask.ext.login import LoginManager
login_manager = LoginManager()

# Flask-WTF csrf protection
from flask_wtf.csrf import CsrfProtect
csrf = CsrfProtect()
These code would the extension objects. Next we would need to initialize the extension with the our Flask application.
$ vim app/app.py
Add this to top
from .models import User
from .extensions import db, login_manager, csrf
and add the following in the function configure_extensions()
def configure_extensions(app):
   # flask-sqlalchemy
   db.init_app(app)

   # flask-login
   login_manager.login_view = 'frontend.index'
   login_manager.refresh_view = 'frontend.index'

   @login_manager.user_loader
   def load_user(id):
      return User.query.get(id)

   login_manager.setup_app(app)

   # flask-wtf
   csrf.init_app(app)
Step 4: create UserModels.py
Okay, now that we have initialized our extensions. We can start with the user model. In SQLAlchemy, each data model correspond one-to-one with a table in the database: User model will contain all the relevant information as a user and most importantly the credentials for logging in on the site.
from werkzeug import generate_password_hash, check_password_hash

from flask.ext.login import UserMixin
from ..common.helpers import JsonSerializer, get_current_time
from ..extensions import db

import UserConstants

class UserJsonSerializer(JsonSerializer):
    __json_public__ = ['id', 'email', 'user_name']
    __json_modifiers__ = {
      'role_code' : ['role', (lambda code : UserConstants.USER_ROLE[code])]
    }

class User(db.Model, UserMixin, UserJsonSerializer):

   __tablename__ = "user"
   def __repr__(self):
      return '<User %r>' % (self.user_name)

   id            = db.Column(db.Integer, primary_key = True)
   first_name    = db.Column(db.String(UserConstants.STRING_LEN), nullable=False)
   last_name     = db.Column(db.String(UserConstants.STRING_LEN), nullable=False)
   user_name     = db.Column(db.String(UserConstants.STRING_LEN),  index = True, unique = True, nullable=False)
   email         = db.Column(db.String(UserConstants.STRING_LEN), index = True, unique = True, nullable=False)
   created_on    = db.Column(db.DateTime, nullable=False, default = get_current_time)
   role_code = db.Column(db.SmallInteger, default=UserConstants.USER, nullable=False)

   # User Password
   _password = db.Column('password', db.String(UserConstants.PW_STRING_LEN), nullable=False)

   def _get_password(self):
      return self._password

   def _set_password(self, password):
      self._password = generate_password_hash(password)

   password = db.synonym('_password',
                          descriptor=property(_get_password,
                                              _set_password))

   def check_password(self, password):
      if self.password is None:
         return False
      return check_password_hash(self.password, password)

   # methods
   @classmethod
   def authenticate(cls, user_name, password):
      user = User.query.filter(db.or_(User.user_name == user_name)).first()

      if user:
         authenticated = user.check_password(password)
      else:
         authenticated = False
      return user, authenticated

   @classmethod
   def is_user_name_taken(cls, user_name):
      return db.session.query(db.exists().where(User.user_name==user_name)).scalar()

   @classmethod
   def is_email_taken(cls, email_address):
      return db.session.query(db.exists().where(User.email==email_address)).scalar()
A couple things are worth talking about here.
passwordfield: notice how the password field is defined using SQLAlchemy's synonym and descriptor.passwordis essentially mirroring_passwordattribute and we use descriptor to define how getting password and setting password behaves, as defined in_get_passwordand_set_passwordrespectively. When setting the password, instead of saving the user password string, we save the hashed password in the db usinggenerate_password_hash.UserJsonSerializermixin: inherited fromJsonSerializerr(seeapp/common/helpersfor definition). This handy mixin provides theto_jsonfunction which will deserialize an instance of the model to json format. Example (after setting upFlask-Scriptin step 5):
$ python manage.py shell
>>> user = models.User.query.all()[0];
>>> user.to_json()
{'role': 'user', 'user_name': u'spchuang', 'id': 1, 'email': u"test@gmail.com"}
UserMixinMixin: provides default implementation of what would be required for Flask-Login.
Step 5.1 : create the database with Flask-Script
Now that we have the user models, we can use it to create the actual database table. To do this, we're going to use Flask-script. This extension allows us to create handy scripts for things like initilizing the database and running a shell with the application context.
vim manager.py
from flask.ext.script import Manager, Shell, Server
from flask import current_app
from app import create_app
from app.extensions import db
import app.models as Models
from app.config import DefaultConfig
import os

def create_my_app(config=DefaultConfig):
  return create_app(config)

manager = Manager(create_my_app)

# runs Flask development server locally at port 5000
manager.add_command("runserver", Server(host="0.0.0.0", port=5000))

# start a Python shell with contexts of the Flask application
@manager.shell
def make_shell_context():
   return dict(app=current_app, db=db, models=Models)

# init/reset database
@manager.command
def initdb():
    db.drop_all(bind=None)
    db.create_all(bind=None)

    # add sample user
    user = Models.User(
            first_name=u'Sam',
            last_name=u'Chuang',
            user_name=u'spchuang',
            password=u'123456',
            email=u"test@gmail.com")
    db.session.add(user)
    db.session.commit()


if __name__ == "__main__":
    manager.run()
Now, by running the following command, you can initialize the database to create the User table and also an example user, which we'll use to test or login later.
$ python manage.py initdb
You should see a file being created in/tmp/test.db, as we configured SQLAlchemy to use a sqlite db at this path. To determine whether or not the user is actually created, you can take a use of Flask-Script's shell commands.
$ python manage.py shell
>>> users = models.User.query.all()
>>> print users
[<User u'spchuang'>]
>>> print users[0].password
pbkdf2:sha1:1000$x8kBSPNw$92b15d93720e001a1cf6343f2b589cff0b198024
Notice how it shows the username of the user. This is defined in __repr__ in the User models object. Also, see how the password field is a hashed view. Besides using the manager shell, you can also examine db data using the sqlite3 interface:
$ sqlite3 /tmp/test.db
SQLite version 3.8.3 2014-02-03 14:04:11
Enter ".help" for instructions
Enter SQL statements terminated with a ";"
sqlite> select user_name,email from user;
spchuang|test@gmail.com'
sqlite> select * from sqlite_master where type='table';
table|user|user|2|CREATE TABLE user (
    id INTEGER NOT NULL,
    first_name VARCHAR(64) NOT NULL,
    last_name VARCHAR(64) NOT NULL,
    user_name VARCHAR(64) NOT NULL,
    email VARCHAR(64) NOT NULL,
    created_on DATETIME NOT NULL,
    password VARCHAR(80) NOT NULL,
    role_code SMALLINT NOT NULL,
    PRIMARY KEY (id)
)
Step 5.2: Testing the database and models
So far we have defined the User model and created the user table. Lets take a step back and do some testing to make sure everything is working correctly so far. It is good to break a meaty project into smaller, testable components. This allows us to establish baselines as we go.
$ python manage.py shell
>>> user, authenticated = models.User.authenticate('random_user', 'test')
>>> print user, authenticated
None False
>>> user, authenticated = models.User.authenticate('spchuang', 'test')
>>> print user, authenticated
<User u'spchuang'> False
>>> user, authenticated = models.User.authenticate('spchuang', '123456')
>>> print user, authenticated
<User u'spchuang'> True
>>> print models.User.is_user_name_taken('spchuang')
True
>>> print models.User.is_email_taken('test@gmail.com')
True
Sweet, it seems like all the functions are working as we expected. As a general note, validating functions in shell is very handy and is a quick way to iterate on the code. But going forward, we'll probably want to add unit tests to cover those logics since it doesn't scale to hand test them everytime. Automated testings guarantees the code to work for all the test coverages and show whether new code has any regression (breaks test cases). Testing is outside the scope of this tutorial, but I'll probably find sometime to give an example how I could do testing in Flask.
Step 6: create UserForms.py
The next step is defining our form validation logic. Data checking is center to everything we do. Whenever we receive some data from the user. We want to make sure we have all the values needed to create a user and for logging in.
from flask_wtf import Form
from wtforms import (BooleanField, TextField, HiddenField, PasswordField,
   DateTimeField, validators, IntegerField, SubmitField)
import UserConstants

class LoginForm(Form):
   login = TextField('user_name', [validators.Required()])
   password  = TextField('password',  [validators.Required()])
   remember_me = BooleanField('remember_me', default = False)

class SignupForm(Form):
   user_name   = TextField('user_name',   [
      validators.Length(
         min = UserConstants.MIN_USERNAME_LEN,
         max = UserConstants.MAX_USERNAME_LEN
      ),
      validators.Regexp(
         "^[a-zA-Z0-9]*$",
         message="Username can only contain letters and numbers"
      )
   ])
   first_name  = TextField('first_name', [validators.Required()])
   last_name   = TextField('last_name', [validators.Required()])
   email       = TextField('email', [validators.Required(), validators.Email()])
   password    = PasswordField(
      'New Password',
      [validators.Length(min=UserConstants.MIN_PASSWORD_LEN,max=UserConstants.MAX_PASSWORD_LEN)]
   )
   confirm     = PasswordField('Repeat Password', [
      validators.Required(),
      validators.EqualTo('password', message='Passwords must match')
   ])
It is pretty straight forward. We define a form for login and another for signup. Flask-WTF allows us to define the fields and specific validations we want for each field. Some default validators are provided but we could also define our own. See the validation logic for username, in which I restrict it to only letters and number using regular expression.
Step 7 : create authentication endpoint api/auth.py
vim app/api/auth.py
# Users API for authentication
'''
   Users API for authentication
'''
from flask import (Blueprint, render_template, current_app, request,
                   flash, url_for, redirect, session, abort, jsonify)

from flask.ext.login import login_required, login_user, current_user, logout_user, confirm_login, login_fresh
from ..common import Response
from ..extensions import db

from ..users import User, SignupForm, LoginForm

auth = Blueprint('auth', __name__, url_prefix='/api/auth')

@auth.route('/verify_auth', methods=['GET'])
@login_required
def verify_auth():
   return Response.make_data_resp(data=current_user.to_json())

@auth.route('/login', methods=['POST'])
def login():
   """ POST only operation. check login form. Log user in """
   if current_user.is_authenticated():
      return Response.make_success_resp(msg="You are already logged in")

   form = LoginForm()
   if form.validate_on_submit():
      user, authenticated = User.authenticate(form.login.data,
                                              form.password.data)
      if user :
         if authenticated:
            login_user(user, remember=form.remember_me.data)
            return Response.make_data_resp(data=current_user.to_json(), msg="You have successfully logged in")
         else:
            return Response.make_error_resp(msg="Invalid username or password", type="Wrong Authentication", code=422)
      else:
         return Response.make_error_resp(msg="Username does not exist", type="Wrong Authentication", code=422)

   return Response.make_form_error_resp(form=form)


@auth.route('/logout', methods=['POST'])
@login_required
def logout():
   """ logout user """
   session.pop('login', None)
   logout_user()
   return Response.make_success_resp(msg="You have successfully logged out")

@auth.route('/signup', methods=['POST'])
def signup():
   if current_user.is_authenticated():
      return make_success_resp("You're already signed up")

   form = SignupForm()

   if form.validate_on_submit():
      # check if user_name or email is taken
      if User.is_user_name_taken(form.user_name.data):
         return Response.make_error_resp(msg="This username is already taken!", code=409)
      if User.is_email_taken(form.email.data):
         return Response.make_error_resp(msg="This email is already taken!", code=409)

      try:
         # create new user
         user = User()
         form.populate_obj(user)

         db.session.add(user)
         db.session.commit()

      except Exception as e:
         return Response.make_exception_resp(exception=e)

      # log the user in
      login_user(user)
      return Response.make_success_resp(msg="You successfully signed up! Please check your email for further verification.")

   return Response.make_form_error_resp(form=form)
Here we define 4 endpoints that we would use for authentication. You may wonder why do we need /api/auth/verify_auth. As I mentioned before, we are creating a pure API backend with frontend powered in javascript. Therefore, as the javascript application first start we need to determine whether the user is already logged in or not. This endpoint does just that - allows the frontend to bootstrap application state. You'll see a quick example in the UI section below.
The Form.validate_on_submit does what the name suggests - validate the input forms. It would make sure the every field passes the validation rules we defined for it and would fail otherwise.
By default, every POST request would have csrf protection on due to Flask-WTF settings. Cross-Site Request Forgery is unlike other hacking techniques where malicious users fake their credentials and behave on your behalf. Instead, hackers injects malicious scripts to trick your browser in doing an unwanted action on a website you're already logged in. In the website's perspective, the action is genuine and trust worthy since it came from you directly even though your browser did it unexpectedly. There are many common fixes for this - one of the which is CSRF protection. Flask-WTF will verify a hashed token for every POST request.
Update app.py to include the blueprint for our authentication API.
# in app/app.py
...
from .api import helloworld, auth
...
DEFAULT_BLUEPRINTS = [
   helloworld,
   auth,
]
Step 8: basic frontend
In this last part, I'll talk briefly on implementing a simple frontend that talks to the backend via jquery
First, Serve the static HTML with a new controller
$ vim app/frontend/controller.py
from flask import (Flask, Blueprint, render_template, current_app, request,
                   flash, url_for, redirect, session, abort, jsonify, send_from_directory)

frontend = Blueprint('frontend', __name__)

@frontend.route('/')
@frontend.route('/<path:path>')
def index(path=None):
   return render_template('app.html')
This controller is responsible for serving static pages, in this case, app/template/app.html.
Now Copy the app/templates and app/static folders from github. Open the file, and notice how we load two javascript files, jquery and our custom javascript file which will be used to communicate with the backend. We will use bootstrap for styles.
// app/templates/app.html
...

{% block js_btm %}
<!-- Put javascript here !-->

   <script src="/static/desktop/vendors/jquery.js"></script>
   <script src="/static/desktop/js/main.js"></script>

{% endblock %}
So our game plan is all in /static/desktop/js/main.js.
// setup csrf token for all ajax calls
var csrftoken = $('meta[name=csrf-token]').attr('content');
$.ajaxSetup({
    beforeSend: function(xhr, settings) {
        if (!/^(GET|HEAD|OPTIONS|TRACE)$/i.test(settings.type)) {
         xhr.setRequestHeader("X-CSRFToken", csrftoken);
      }
    }
});

$(document).ready(function(){
   // initial check to see if user is logged in or not
   updateAuthStatus();


   // setup logged in view
   $('#logged-in-view button').click(function(){
      logout()
         .done(function(response){
            showLoggedout()
         }).fail(function(response){
            showLoggedIn();
         });
   });

   // setup signup view
   $('#signup-view #signup-form').submit(function(e) {
      e.preventDefault();
      var form = $(this);
      var signupData = extractFormInput(form);

      signup(signupData)
         .done(function(response){
            alert('You just created a new user');
            form.trigger('reset');
            updateAuthStatus();
         }).fail(function(response){
            alert('Something went wrong');
         });

   });
});

// helpers
function updateAuth() {
   verifyAuth()
      .done(function(response){
         showLoggedIn(response.data.user_name)
      }).fail(function(response){
         showLoggedout()
      });
}
function extractFormInput(form) {
   var inputs = form.serializeArray();
   var data = {};
   $.each(inputs, function(index, input) {
      data[input.name] = input.value;
   });
   return data;
}

function showLoggedIn(username) {
   // show logged in view and show username
   $("#logged-in-view span").text(username);
   $("#logged-out-view").addClass('hidden');
   $("#logged-in-view").removeClass('hidden');
}

function showLoggedout() {
   // show logged out view
   $("#logged-out-view").removeClass('hidden');
   $("#logged-in-view").addClass('hidden');
}

// API calls
function verifyAuth(callback) {
   var url = '/api/auth/verify_auth';
   return $.get(url);
}

function login(loginData){
   var url = '/api/auth/login';
   return $.post(url, loginData);
}

function logout() {
   var url = '/api/auth/logout';
   return $.post(url);
}

function signup(signupData) {
   var url = '/api/auth/signup';
   return $.post(url, signupData);
}
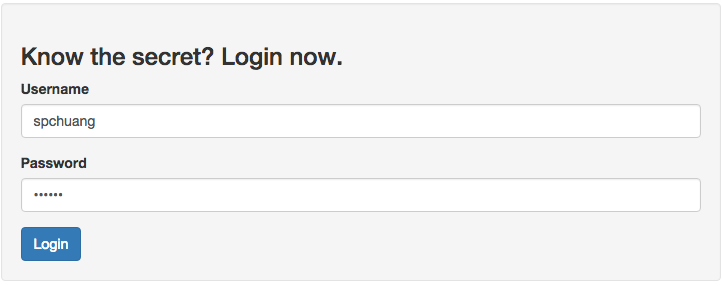
Login view
After logging in

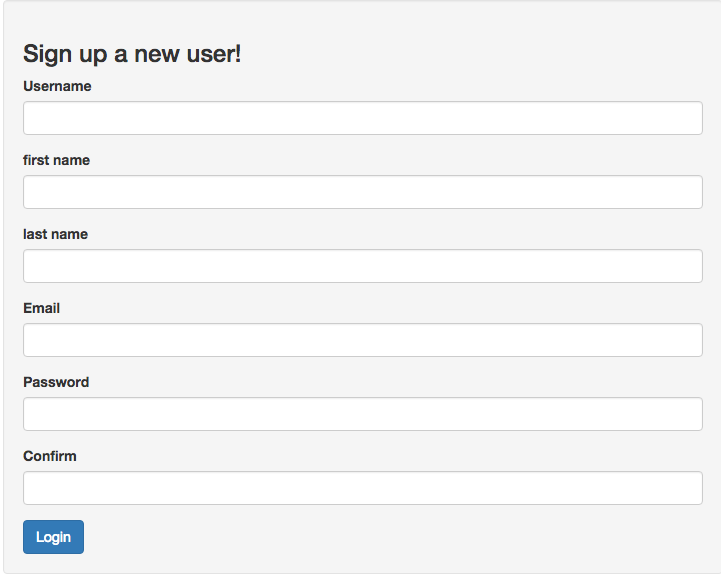
Signup view
Thats it! Now you have created a simple user system in flask that could create new users and log existing users in. In a following post, I will work on the UI side of things and show example of using Backbone to power the user authentication.